Part 5: The Prove & The Bake
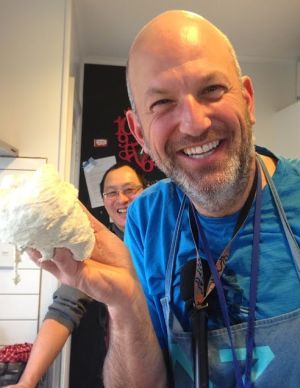
A table of steps for a Saturday bake - take a look at the sourdough image gallery
|
Start Time |
Activity |
Notes |
Equipment |
|
7 pm Thursday |
Take starter out of fridge |
Keep at room temperature ideally between 18-24 degrees Always wash your hands with warm water and soap before starting any procedures. Rinse equipment, containers in hot water, DON'T dry with tea towel |
|
|
9 pm Thursday |
Feed starter with 100g filtered water and 70g of strong white flour |
Give it a good whipping/stir, should be like a pancake batter |
Clean spoon |
|
7-9 am Friday |
Feed starter with 100g filtered water and 70g of strong white flour |
Give it a good whipping/stir, should be like a pancake batter |
Clean spoon |
|
7-9 pm Friday |
Make preferment (poolish) if the starter looks vigorous. bubbly and ripe (see photos on the web page). Use this spreadsheet to determine flour/water/starter quantity. Mix the ingredients and put in sealed container. |
Simon did a 1kg loaf to start with. Keep preferment at room temperature. |
A small soft tip spatula is good for mixing the small amounts |
|
Fri PM |
Reduce leftover starter to 50g, add 100g Water and 70g Flour and mix and place back in fridge after an hour. Discard leftover or give to friends! |
Reduce mother starter for storage until your next bake. |
Airtight food safe container |
|
Sat 7:45am |
Check preferment is ripe - use the float method by taking a teaspoon of the preferment and make sure it floats in water. Add 271g water and stir the mixture up - break up the preferment. USE SPREADSHEET or if you have any queries email us. |
Keep things clean! |
|
|
Sat 8am |
Add the balance of the flour and water using the spreadsheet above. Mix gently until it goes 'shaggy' so not combined completely but a bit rough and messy. Cover with damp tea towel. |
From here on it's a series of 30 minute steps so stay attentive! |
Clean bowl Wet tea towel Danish dough whisk or soft tip spatula |
|
Sat 8:30am |
After 30 mins add the salt as specified in the spreadsheet above. Sprinkle over the dough and then gently press it into the dough by squeezing it softly. Use non iodised salt. Cover the dough with a wet tea towel and leave at room temperature for another 30 mins. |
Spray fine mist of water on dough and in bowl using sprayer. The important rest period between mixing flour/water/preferment and the salt is called 'autolyse' |
Hand held spray mister |
|
Sat 9am |
First fold |
See Mixing by Hand - YouTube Spray bowl and dough |
Hand held spray mister |
|
Sat 9:30am |
Second fold |
Spray bowl and dough |
Hand held spray mister |
|
Sat 10am |
Third fold |
Spray bowl and dough |
Hand held spray mister |
|
Sat 10:30am |
Fourth fold (Optional) |
Decide if you need to do 4 by feeling the dough - it needs to be airy and springy. |
|
|
11am |
Bulk Prove |
Keep the dough at 25C or as close to. The dough should double in size - if it's too cold it will take longer. Don't get too hot as you can get funky flavours when the temperature is above 30C. Do not over-prove! Best to under prove as there's more proving to happen in the bannetons (proving baskets). |
Warm consistent temperature spot. 25-27C degrees Proving Cabinet (the ultimate for home bakers) |
|
12:30pm |
Shape |
Shape loaf and place into banneton for final prove. Create surface tension on your 'boule'. |
Dough scraper Natural fibre banneton |
|
1:30pm |
Final prove in banneton |
Mist and cover with damp tea towel, or use a plastic bag. The 'boule' should rise to the top of the banneton (see gallery). This can take 30-40 mins depending on temperature. |
Proving bowl or banneton |
|
2:30pm |
Score loaf and bake |
Bake sourdough bread at 240C. Preheat your oven for at least 30-40 minutes before baking. Employ the 'Dutch Oven' method to produce a loaf as if its was baked in a commercial oven. Use a lame or razor blade. Scoring Sourdough - What Did I Do Wrong? - YouTube Use a separate oven thermometer to accurately read your ovens internal temperature. Don't rely on the dial setting. Mist the loaf before putting in your dutch oven. Cook for 20 minutes at 240C then take the lids off and develop your crust for up to 10 minutes. Watch it closely once you've taken the lid off! |
Lame or razor blade Oven thermometer Dutch oven See note below |
|
3:10pm |
Rest |
Wait at least 40 mins for the loaf to cool and the crumb to develop – cut early and you'll squash it! |
Listen to This Way Up on Saturday for the latest instalments of Simon's sourdough odyssey.
Notes from Neville
Employ an independent oven thermometer to check your ovens internal temperature. I have not seen an oven yet where the dial temp is actual oven temp. Check the oven thermometer during the bake as temperature can creep up or down without you touching the dial.
Even my commercial ovens are not dial accurate. My E35 Bakbar dial setting is 210C, actual oven temp is 240C. My other gas deck oven shows 260C on the digital readout and dial, actual oven temp is 240C
Simons oven dial temp of 240C is actually the internal oven temp, but I noticed from the oven thermometer it started creeping up to 280C without touching the dial halfway through the bake.
Oven dial thermometers are placed in the oven and you read the oven temp from the glass door. They are not expensive, around $10.
Commercial baking ovens
Have a steam function which allows for the oven cavity to be saturated with moist steam. These oven are plumbed into a fixed water supply. Once the bread is/or while its being inserted into the oven, moist steam is pumped into the oven cavity. The reason for this is to moisten the surface of the loaf so it can remain elastic and oven spring (expand) to its maximum before hard crust forms. The resulting loaf will have good height, light crumb & the crust will be thin and crisp.
You can replicate this baking environment in your domestic oven by employing the “Dutch oven” baking method cast (an iron pot with fitting lid).
Scoring (cutting) your loaf before baking
Scoring the loaf before baking allows the loaf to expand where you want it to. It aids in the expansion of the loaf, improves crumb texture & crust appearance. There is no substitute, use a bread lame knife for best (and safest) results.
Excellent scoring video with Cyril Hitz …
Kneading dough
Use the fold knead method – it's gentle on the dough and effortless to do.
Watch Ken Forkish's fold kneading method and employ it.
Shaping Loaves - create tension on the surface of the loaf
Shaping loaves of bread is a skill in itself. The aim of shaping, aside from creating the shape of the loaf you want, is to create tension on the outside surface of the loaf. Check out this excellent video for shaping tips…
Use a natural fibre Banneton to hold and final prove your shaped loaf: (photo attached)
Bannetons are used for the final fermentation (prove) of the loaf and for forming and supporting the shape of the loaf. They are an invaluable piece of artisan bread making equipment.
Stuck for a warm quite spot to prove your dough?
Ideally you want the internal temperature of the proving sourdough to be around 25 –27 degrees. You want to find a warm spot with a consistent temperature. An inverted cardboard box with a hot water bottle works. There is a very sophisticated home proofing cabinet available in NZ now.
Organic NZ Diastatic Malt Powder
Is a well-kept secret of artisan bread bakers. Diastatic malt is made from barley grain which is sprouted then dried at a low temperature then milled into a powder. Diastatic malt powder is rich with minerals and enzymes that act as natural preservatives and boost the nutritional value of breads. Further, the chemical reaction of the malt with yeast/sourdough and flour enhances the texture, size, appearance and flavour of your bread.
"Diastatic" refers to the diastatic enzymes that are created as the grain sprouts. These enzymes when mixed into bread dough convert starches in the flour to sugars, which feed the yeast/sourdough. Artisan sourdough and yeasted breads with DM added will have superior crust colour, crumb texture and a sweeter flavour. DM is very important to have in doughs (yeasted or sourdough) that have long fermentation times or are retarded overnight in the fridge.
Only a small amount of DM is added to the flour, typically 0.5% to 3% of the total amount of flour used for a loaf of bread. For example a loaf of bread containing 1000g of flour @ 0.5%, you would use 5g of DM (a teaspoon). As Diastatic malt powder is such a specialised and unknown to most ingredient you won’t find in retail shops. Hop on to Trade Me and search ‘organic NZ diastatic malt powder’.
Equipment
Bread lame knife - there is no substitute for one of these tools. Score is precise and safe!
A Dutch oven - cast iron pot with fitting lid.
Bread books
If I was only allowed two bread books, these would be the ones …
Flour, Salt, Water, Yeast by Ken Forkish. Fantastic book, simple effective modern techniques and recipes. Easy to follow. Ken's style of baking is the same as how I bake.
Bread (second edition), A Bakers Book of Techniques and Recipes by Jeffrey Hamelman I - an excellent technical book for professional bakers and home bread baking enthusiasts. Enough bread recipes to last you a lifetime!
Making sourdough with Simon Morton.
- Part 1: Making tasty sourdough bread at home
- Part 2: Getting started and making a sourdough starter
- Part 3: The science of sourdough
- Part 4: The pre-ferment
- Part 5: The prove & the bake
- Image gallery: Sourdough
Some excellent sourdough sites
- Susan's Wild Yeast Blog – she is a fantastic baker and her blog site is world-class.
- Northwest Sourdough
- The Fresh Loaf